How to Make Oreo Cookie at Home –Better Than Market.
The moment you take a bite of a homemade Oreo cookie, it’s pure bliss. The crisp snap of rich chocolate cookies followed by that smooth, creamy filling melting on your tongue. It’s the kind of treat that instantly takes you back to childhood yet feels even more indulgent when made from scratch. The deep cocoa aroma wafting from your oven, the soft swirl of vanilla cream, and that first perfect sandwich you assemble and honestly it is hard to resist sneaking one before they’re even done.
What makes this recipe truly special is how fresh and flavorful it tastes compared to store-bought versions. When you learn how to make Oreo cookie at home, you’re not only just baking but also, you’re creating a dessert that’s richer, softer, and tailored exactly to your taste. Whether you love them extra chocolaty, slightly less sweet, or generously filled with cream, every bite feels like a reward you made with your own hands.

How to Make Oreo Cookie at Home – Irresistibly Creamy, Chocolatey & Better Than Store-Bought!
4
Piece20
minutes10
minutes120-140
kcal15
Minutes10-12
Minutes40-45
MinutesThis recipe is designed to be simple yet rewarding. You’ll need about 20 minutes to prepare the dough and another 12–15 minutes to bake. In under an hour, you’ll have around 18–20 cookies ready. It falls under American-style desserts, and even beginners can confidently try it.
Ingredients
- For the Chocolate Cookies
1 cup all-purpose flour
½ cup unsweetened cocoa powder
¾ cup powdered sugar
½ cup softened butter
1 tsp vanilla extract
½ tsp baking soda
Pinch of salt (According to Taste)
- For the Cream Filling
½ cup butter (softened)
1½ cups powdered sugar
1 tsp vanilla extract
1–2 tbsp milk (for consistency)
How To Cook (Step-by-Step Instructions)
- Make the dough – Mix Cream butter and sugar until smooth. Add vanilla. Mix in flour, cocoa powder, baking soda, and salt to form a soft dough. Chill for 15 minutes if sticky.
- Shape cookies – Roll out the dough and cut into small round discs. Place on a lined baking tray.
- Bake – Bake at 180°C (350°F) for 10–12 minutes. Let them cool completely to become crisp.
- Prepare filling – Beat butter, powdered sugar, and vanilla until creamy. Add a little milk if needed.
- Assemble – Spread or pipe the cream on one cookie and sandwich with another.
- Your homemade Oreo cookies are ready to enjoy!
Key Highlights
This recipe is designed to be simple yet rewarding. You’ll need about 20 minutes to prepare the dough and another 12–15 minutes to bake. In under an hour, you’ll have around 18–20 cookies ready. It falls under American-style desserts, and even beginners can confidently try it.
Ingredients For Oreo Cookies:
For the Chocolate Cookies:
You’ll need 1 cup all-purpose flour, ½ cup unsweetened cocoa powder, ¾ cup powdered sugar, ½ teaspoon baking soda, and a pinch of salt. Add ½ cup softened butter and 1 teaspoon vanilla extract to bring everything together. If you prefer a healthier twist, you can substitute half the flour with whole wheat flour.
For the Cream Filling:
Take ½ cup butter (softened), 1½ cups powdered sugar, and 1 teaspoon vanilla extract. For a vegan option, swap butter with plant-based margarine.
Step-by-Step Instructions for Cooking Oreo Cookies:
1. Prepare the Cookie Dough
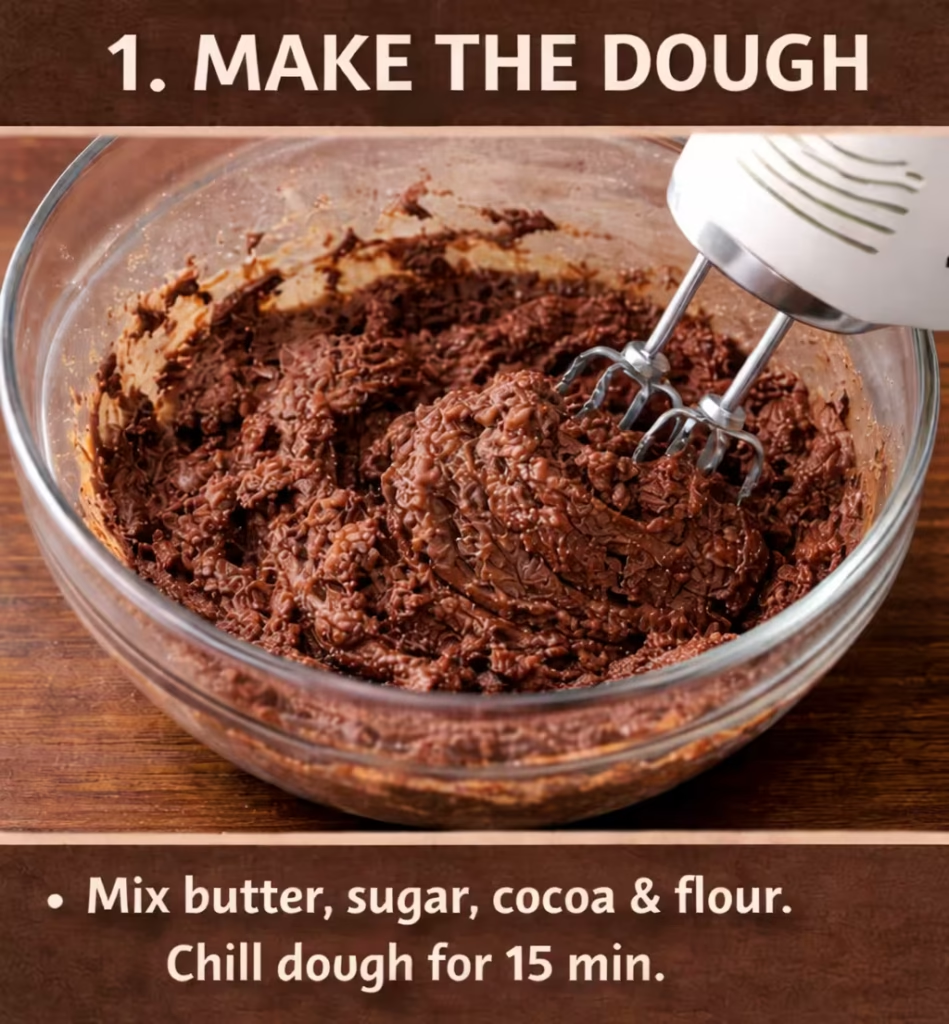
Start by taking a mixing bowl and adding softened butter and powdered sugar. Using a whisk or hand mixer, beat them together until the mixture becomes light, smooth, and creamy. This step is important because it creates the base texture of your cookies.
Next, add vanilla extract and mix again. Now sift in the dry ingredients such as flour, cocoa powder, baking soda, and a pinch of salt. Gradually combine everything using a spatula or your hands until a soft dough forms. If the dough feels sticky or too soft to handle, cover it and refrigerate for about 15 minutes. This resting time helps make rolling easier.
2. Roll and Shape the Cookies
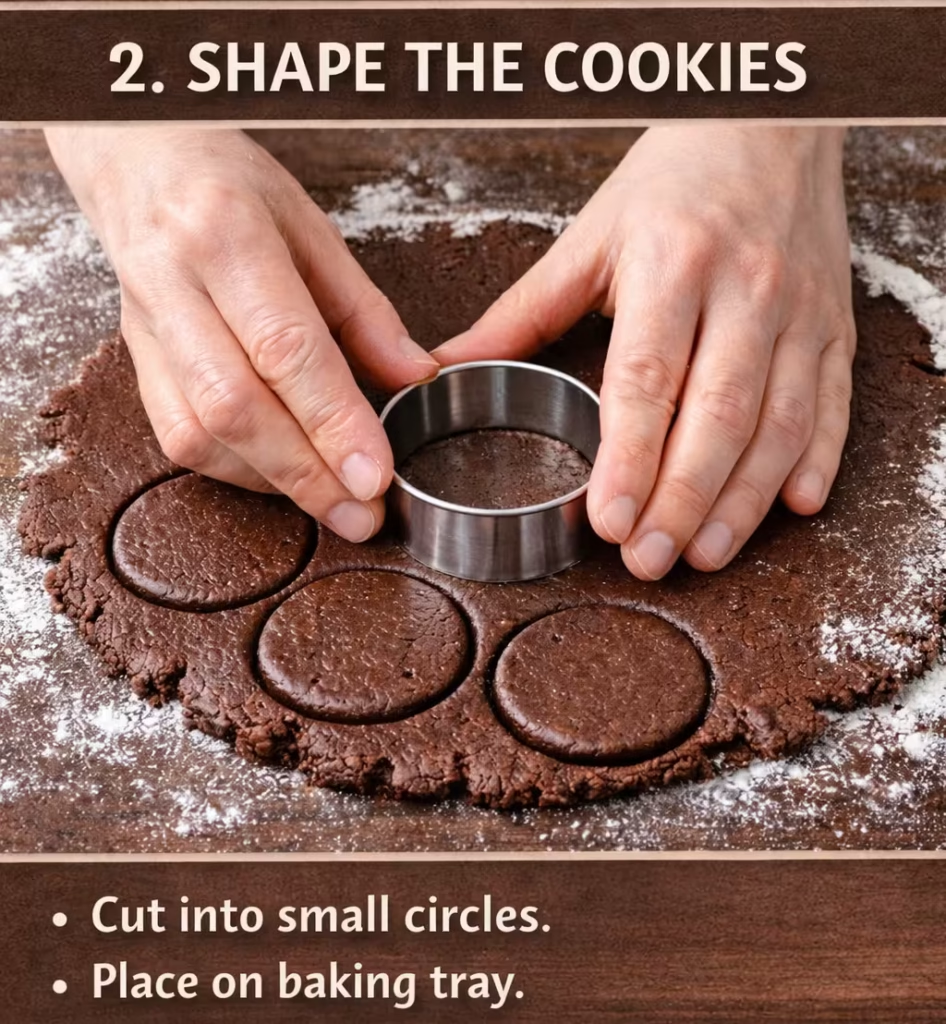
Once the dough is firm, place it on a clean flat surface lightly dusted with flour. Roll it out evenly to about 2–3 mm thickness. This is key for getting that classic thin Oreo crunch.
Use a round cookie cutter, bottle cap, or small glass to cut out uniform circles. Carefully transfer the cookie discs onto a baking tray lined with butter paper, leaving a little space between each cookie. If you want a classic Oreo-style design, gently press a fork or patterned object on top.
3. Bake the Cookies
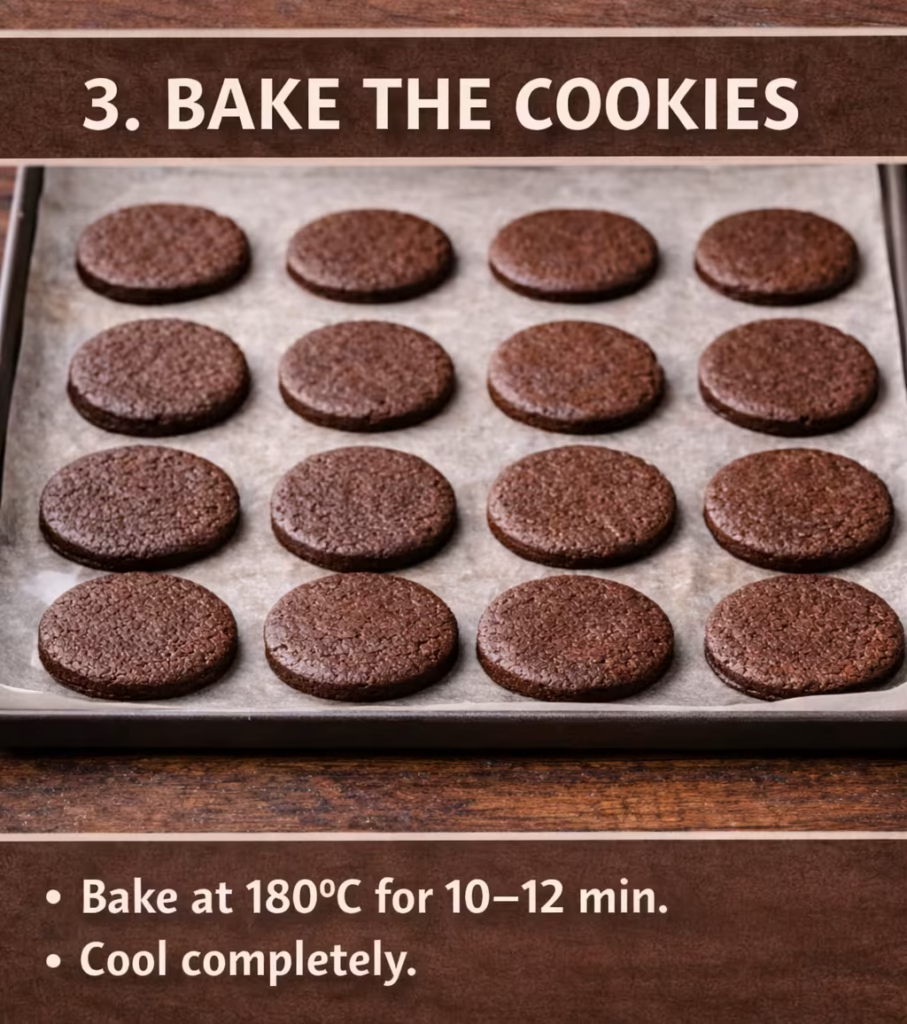
Preheat your oven to 180°C (350°F). Place the tray in the oven and bake for about 10–12 minutes. Keep an eye on them because overbaking can make them too hard or slightly burnt.
Once done, remove the tray and let the cookies cool completely on a rack or plate. Don’t worry if they feel slightly soft at first, they will crisp up as they cool, giving you that perfect Oreo texture.
4. Prepare the Cream Filling
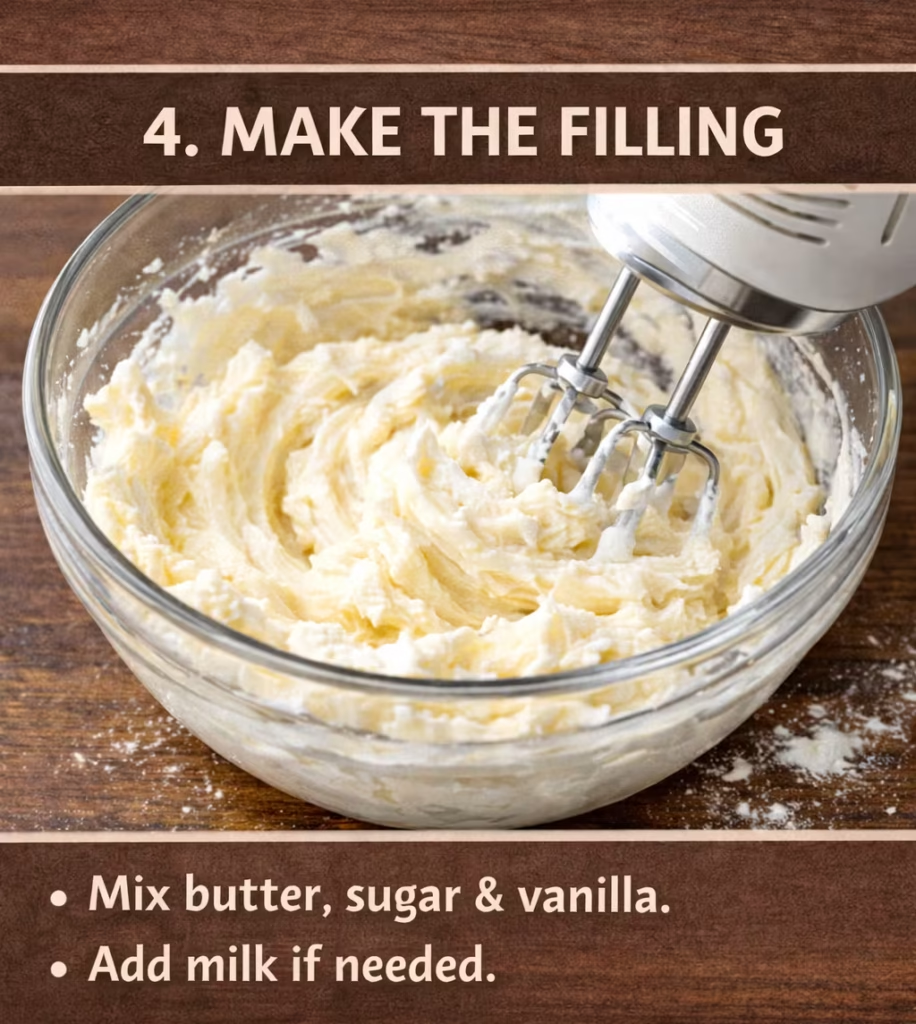
In another bowl, add softened butter and beat it until fluffy and pale. Gradually add powdered sugar and continue mixing until smooth and creamy. Add vanilla extract for flavor.
If the filling feels too thick, add 1–2 tablespoons of milk little by little until you get a smooth, spreadable consistency. The filling should be light, creamy, and easy to pipe or spread.
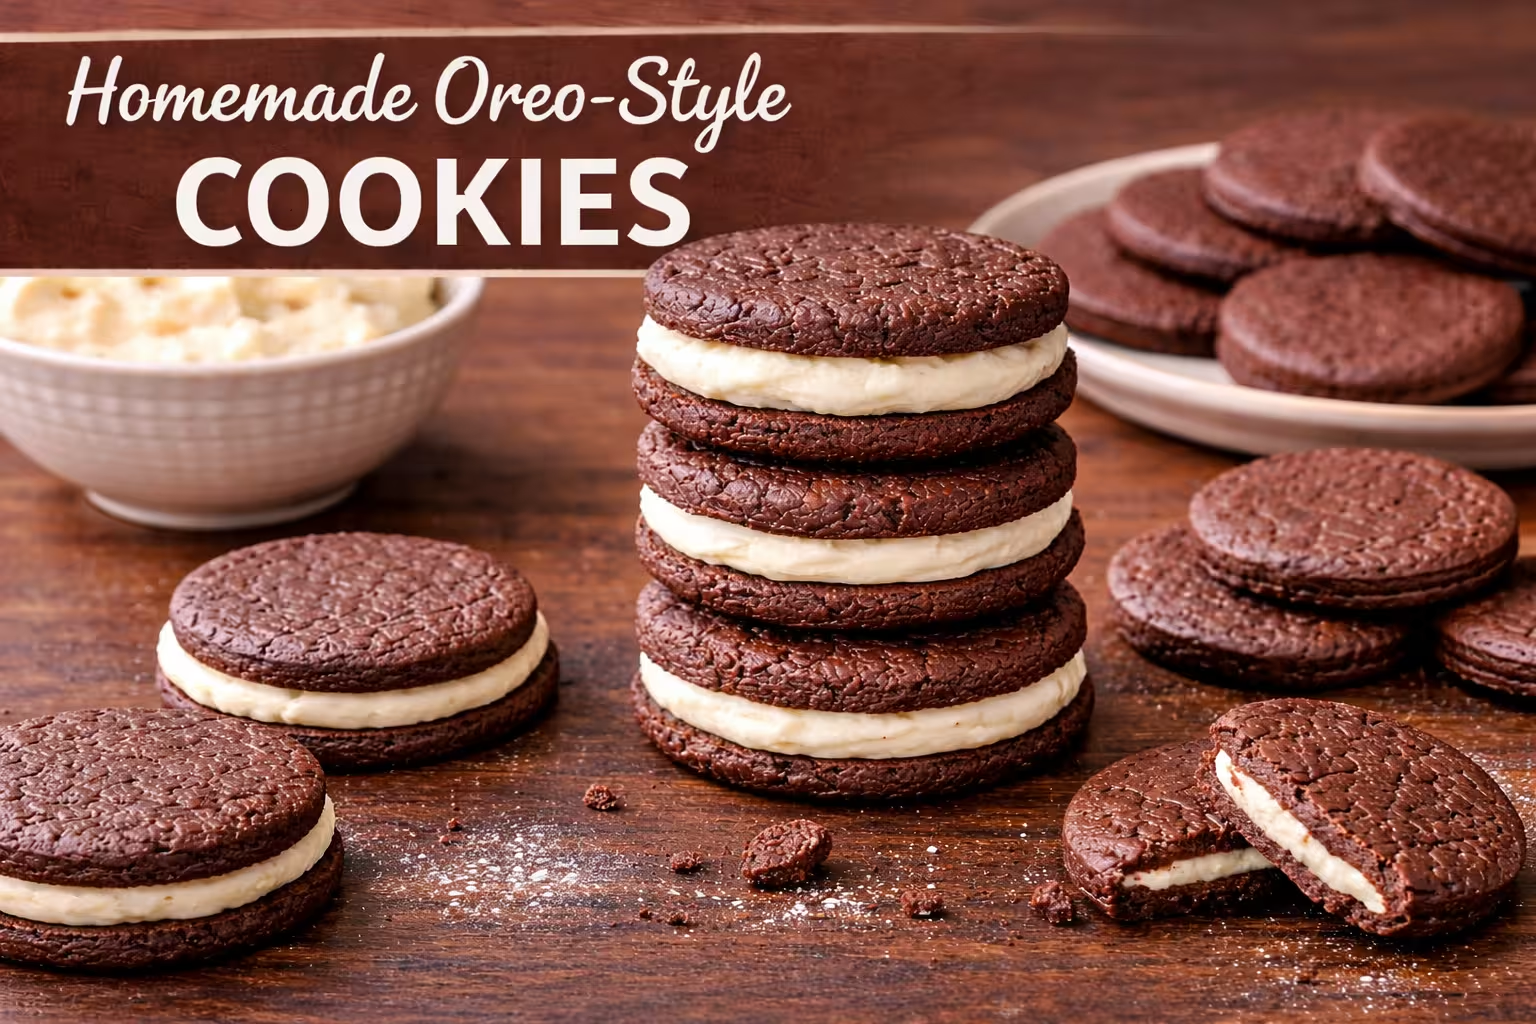
5. Assemble the Oreo Cookies
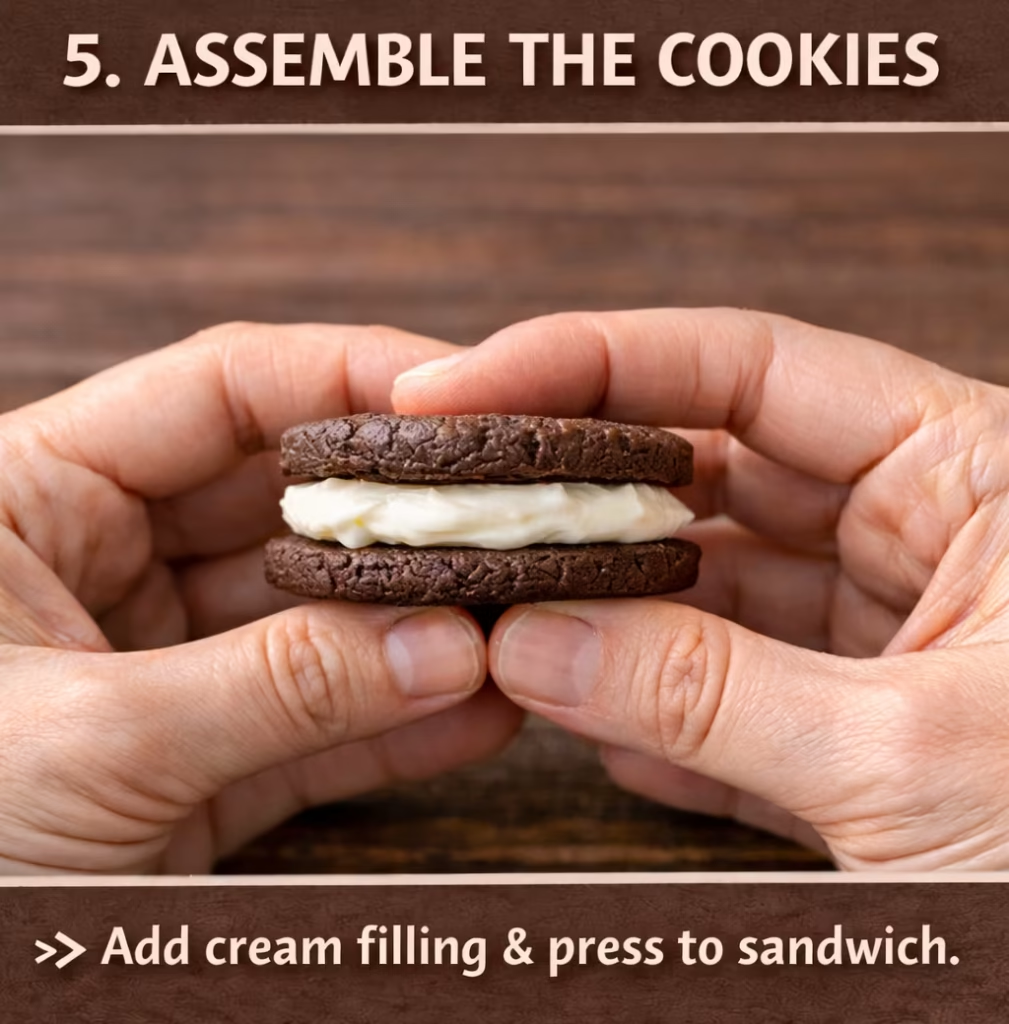
Take one cooled cookie and add a generous layer of cream filling on the flat side. You can use a spoon or piping bag for a neat finish. Then gently place another cookie on top and press lightly to spread the cream evenly.
Note: Repeat the process with the remaining cookies. Let them sit for a few minutes so the filling sets slightly.
Pro Tips for Perfect Oreo Cookies:
To get that authentic Oreo taste, always use good-quality cocoa powder. It makes a huge difference in flavor and color. Don’t overbake the cookies; they should be slightly soft when you take them out because they harden as they cool.
If you want that signature Oreo look, you can press a fork or design stamp lightly on top before baking. And for extra indulgence, try adding chocolate or coffee flavor to the cream filling.
Storage Tips for Storing for A Long Time:
Homemade Oreo cookies can be stored in an airtight container at room temperature for up to 5–7 days. If you live in a hot area, keep them in the fridge so the cream filling doesn’t melt. Before serving, let them sit at room temperature for a few minutes for the best texture.
My Observations regarding Oreo Cookies:
Making Oreo cookies at home is not just about baking, it’s about creating something fun, delicious, and personal. Whether you’re baking for yourself, your family, or guests, these cookies are guaranteed to impress.
So, next time you crave Oreos, skip the packet and try this homemade version. you might just fall in love with baking.